Thursday, January 28, 2010

Sketch Challenge at Splitcoast Stampers (SC265)

Okay, I'm supposed to be cleaning... but you know (I'm inbetween loads of laundry and I'm having a quick cup tea before I tackle the vacuuming, any excuse to sit in front of the computer!)

But I've got these three cards I just want to share with you all. I'm loving this Basic Grey Origins paper! Love the colors and each paper design.

This card is for SCS Sketch Challenge 265 and it's posted at Splitcoast. I've not posted too much there and this is actually the first time I've participated in a challenge, I've only put my DT work from Christian Paper Crafts over there but there certainly is a lot to check out. Lots of fun tutorials and some great ideas! Here is the link for the Sketch Challenge site The ribbon is from Michaels, the flower and button is from Making Memories. Cardstock is from Paper Accents. The stamp is from Inkadinkadoo. I used my Cuttlebug to diecut the Nestabilities Label One for the sentiment. Ink is Archival, coffee and I blended Distress ink (antique linen) around the sentiment.

OCCSC #49 I started this card with the inspiration from Our Creative Corner but I've not posted it over there but I do want to give them credit for starting the creative inspiration!!

I love the how the butterfly turned out. I first stamped and heat embossed with gold embossing powder and then I used Perfect Pearls (Forever blue and Forever green) to color it in. I then cut it out and then added the green pearls for the body. I love the shimmer. There are two ways to use Perfect Pearls and I chose to use them by mixing them with water on my craft sheet and then painted them. I wasn't particularly careful because I knew I would be cutting the image out.

The ribbon is from Michaels (I hit a sale!! whoo-hoo), the stamps from Inkadinkadoo, the pearls from Creative Charms and the card base from Bazzill. You'll have to click to enlarge to see the border punch from EK Success towards the bottom of the card and I also used my Cuttlebug to diecut the Nestabilites Label 1 for the sentiment and inked the edges with Distress Ink antique linen using a blending tool from Ranger.

Here is my last card and my least favorite, although I love the papers! The only additional product I used would be my EK Success photo corner (scallop) punch. Everything else is covered in the above descriptions. Sorry the pic is not the best, I should have cropped it so that you could see a little more detail. But if you click to enlarge you'll definitely see ALL the details!!

Well, it's back to cleaning the house and I need to finish making dinner for a friend who just had a masectomy this week and is recovering at home. Hope you'll check back later to see our BIBLE VERSE THURSDAY CHALLENGE FROM CHRISTIAN PAPER CRAFTS!!
Have an excellent day!

Photobucket

Tuesday, January 26, 2010

Sketch Tuesday at CPC!

Just a quick hello and a card to share for this weeks Sketch Tuesday! Gloria has a fabulous sketch for us at Christian Paper Crafts and I managed to get a card done late last night and finally able to get it posted! I had fun trying a new technique to make this "blossoming" flower that I saw on Mercy Kerin's blog and HERE is the link to the tutorial. I did use a smaller scallop circle punch so I used less layers and it doesn't look exactly like the one in the tutorial but I guess that's the fun part of improvising when you don't have the exact tools on hand!

I kept mine pretty plain but can you see this sprayed with some GlimmerMist? I will be trying this again (with the Glimmer Mist!!). Wonderful way to use up those scraps! I recommend using doubleside paper. I used cardstock and a couple of the BG Origins paper.

Here's a side view so that you can see the layers (approx 6)

Ingredients:
Paper: Basic Grey (Origins) and Bazzill
Stamps: Inkadinkadoo (sentiment) and Swirls by Hot Off the Press
Ink: Archival, coffee
Embellishments: brad, Making Memories; Dimensional Pearls, Adirondack
Tools: Punches (3) EK success, corner rounder; Large Blossom, Marvy Uchida; Small scallop circle, Marvy Uchida.

Tomorrow I'll have another card to share from the Basic Grey Origins paper, I'm almost done making a set of cards for my mom. Thanks for looking and have a wonderful week!

Photobucket

Thursday, January 21, 2010

How Sweet it is! Continues with Gina K Designs

Thanks for visiting!! I have everything but a card to share today! Which really is a tribute to Gina K Designs and StampTV. Stamps may be the meat and potatoes at GKD but there are a lot of side dishes and desserts to look at too!! (do you like my analogy!!) I encourage you to check out the site and I also want to take this time to thank Gina Krupsky for sponsoring the Design Team this month at Christian Paper Crafts. The packet of merchandise you sent us was exceptional!! Thank you so much, it was a fun, creative month!
Here is my first project using Nina Brackett's Heart favor box template pack


Once I cut out the heart pattern, I used my Distress Ink blender (Ranger) and Worn Lipstick Distress ink and blended around all the edges. Then I stamped the heart (How Sweet it is!) on all four sides with Crimson Archival ink. I painted the middle of each heart with white Smooch Pearlized Accent ink. Then I assembled the box, attached the ric rac (American Crafts) and cut out heart shapes from pink vellum and added them to the top for a little extra fun! Now I'm ready to fill it with some sweets for my sweet! Of course it will have to be sugarless sweets since dh has diabetes. Thank you Nina for the Heart Template Pack!! Nina also designed my siggy at the end of my blog, isn't it cute!! I just love it.

Project number 2 is a checkbook cover that I altered using some of the FREE digital paper designed by Emily Giovanni (Rich and Shabby Freebie). I already had the clear vinyl covers so all I had to do was cut the paper to fit and then I added a little detail to the front. I wanted it to look like a small purse so I used my Label One Nestibilities (two different sizes) and then cut them in half and added it to the strip of coordinating paper. Then I added a flower with a button. The button I added tiny green pearls to the center and applied Glossy Accents over it for a more custom look. Hopefully if you click on the photo to enlarge you'll be able to see the detail. If not, come to California and I'll be happy to show you!!


Front of the checkbook cover

Here is project #3 and I'm so getting prepared for Valentine's Day! It is my "recycled" project! It was a tin of flavored coffee, but now it's been repurposed for gift giving! I used some "leftover" Claudine Hellmuth Sticky Back Canvas that I had on hand already prepped with Gesso and painted it Sable Brown (Studio paint by Claudine Hellmuth). I then used my favorite "HEART" stamp from GKD and stamped with Adirondack Dabber : Metallic Pearl. (you can just see the corners of the hearts on the lighter brown tin) I punched an oval scallop (Marvy Uchida) out of the PURE LUXURY chocolate cardstock from GKD and stamped on it and attached it to the container with 3-D foam squares. I also paper pieced a heart I had stamped (Archival ink, coffee) on the PURE LUXURY white cardstock, colored the heart with Prismacolor (Rouge Neon) pencil. Added the sentiment (Archival ink, coffee) then attached the American Crafts Ribbon and the GKD button. The top I finished off by measuring a piece of the Pure Luxury white cardstock and blended Worn Lipstick, (Distress Ink) all around the edges, stamped the hearts with the coffee Archival ink and add a ribbon across to hold the tiny card in place. I'm not too happy with the pics 'cause it's much cuter in person! And if you just read all that, bravo to you!! :-)

Repurposed tin for filling up with some homemade(?) goodies or probably some chocolate kisses!

Ahh, my last project for this post!! Another sweet heart box from Nina's Template pack. This time after cutting out the box, I used Tattered Angels Glimmer Mist (Raisin Rum) and sprayed the entire box. I then used one of the FREE Digital Papers by Emily Giovanni
(Rich and Shabby, I love those colors!) I used my EK Success 2" square punch and cut out 4 pieces and using the corner rounder from EK Success I softened each square and before attaching to the box I added dots of silver Stickles to the center of each blossom on the paper.(the second photo shows the bling!) I tied a ribbon around the box added a small blossom (Pure Luxury white cardstock, inked with Dusty Concord Distress ink, that I had punched out (Marvy Uchida) and added the silver Stickles then Glossy Accents (Ranger) I was actually trying to make a button but didn't have a hole punch small enough. I made a little tag and attched it with ribbon, added more silver dots (Stickles) to the top of the box (heart). And ta-da, I'm done.... whew!

Thanks so much for looking!! God bless.


Photobucket

Tuesday, January 19, 2010

Sketch Tuesday and another Color Challenge

Hello! It's technically still Tuesday on the west coast so I'm not late posting this latest sketch challenge from Christian Paper Crafts!! Hooray! I was multi -tasking, listening to Beth Moore's teaching on Daniel and card making, can it get any better?? I even had a cup of hot tea with some delicious Italian Sweet Cream (Coffee Mate see pic below!) that was like having dessert, yum!!! Nice relaxing evening while the rain was coming down in buckets, I was in the comfort of my own craft room enjoying my tea listening to one of my favorite teachers! Nice!

Here is our sketch AND I've incorporated a Color Challenge from Our Creative Corner, this was my first visit there and I loved the colors (blue and green) for the challenge so I said, I think I'm going to accept the challenge!! So, I hunted down some blue and green color in my patterned paper selection and this is what I've come up with!
CPC-ST40
As you can see by the sketch there are lots of possibilites. I chose a sympathy card because I'm still making a set for my mom. This came together quickly once I knew what papers I was using. I used my cuttlebug to dry emboss the light green paper (Fancy Pants) and mounted both the pattern papers with Bazzill cardstock (green and navy) Basic Grey is the other designer paper. I used the Label One Nestabilites for the sentiment (MSE) and blended Distress Ink (broken china) around the edges. The sentiment was stamped with Cobalt blue Archival ink. The ribbon is from Bazzill and the pearls are from a company called Creative Charms. I think that's about it on the ingredients. Hope you are all staying warm and dry!! Thanks so much for looking and God bless you.

Couldn't resist!


Photobucket

Sunday, January 17, 2010

Happy Birthday to You! 2 sketches and 2 cards!

Welcome!! Today is my niece Bobbi's birthday and since I won't get the card mailed off in time to get there (duh!) I thought of the next best thing.... since she reads my blog (since you read my blog B.Wright) she can get a preview of what will be coming in the snail mail!! Happy Birthday to you, Bobbi!!! I will see you in February, right or is that Wright, Miss Adventurous one?

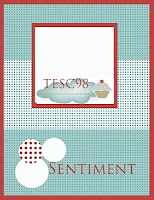
And while I was at it I found this great sketch at Taylored Expressions AND I did the Color Monday Challenge at Christian Paper Crafts which was the color TEAL and WHITE and your choice of another color and I chose YELLOW. Perfect for the Basic Grey DP (pattern, yellow and teal solid cut with a nestabilities diecut) I used. I'm also continuing to use the Gina K Designs stamps, (our sponsor this month at CPC) How Sweet it is! set and Pure Luxury cardstock (cream). The yellow Basic Grey was embossed with a Cuttlebug folder. The button is from GKD and the flowers are Making Memories. I colored the image with Prismacolor pencils and OMS. I blended antique linen and mustard seed Distress Ink around the image.
TESC98 and CPC-CM40

Okay I've got even another card to share and another birthday! It was my friend Francie's birthday on Saturday and I didn't get this card in the mail in time for this one either and today is Martin Luther King Day and I don't believe there is any postal service, so it will be really late. What's the saying I'm not perfect, just forgiven :-)
I also used another fabulous sketch this time from the Card Patterns blog (Nina B. is hosting this weeks challenge, with a fabulous giveaway, check it out!)

inside of card


This one was a little more complicated because of the tags but I sure enjoyed making them and it gave it a real personal touch.
Ingredients: Designer Paper: American Crafts, Bella Blvd;
Cardstock : Paper Accents and Pure Luxury (Gina K Designs, chocolate)
Stamps: Inkadinkadoo;
Ink: Archival, olive; Distress ink: peeled paint and antique linen
buttons: Gina K Designs
hemp cording, nestablilities label one, tags: Paper Accents; edge distressing tool:Heidi Swapp; Ek Success, corner rounder.

Thanks for looking and have a fantastic week!


Photobucket

Wednesday, January 13, 2010

All Pout No Tears? And Welcome Baby!

Welcome to Delightful Details!
I've been having a wonderful time using the Gina K Design products this month. All of the Design Team at Christian Paper Crafts are having fun creating! Just want to start by saying thank you again to Gina for being our sponsor during January 2010, it has been such a blessing! Today is my turn to share a project or two or maybe three!! I've been "sitting" on these projects for about 3 weeks and it's been so hard keeping these to myself!

Project #1

(I hope you'll click to enlarge I love this picture of Addy! My youngest granddaughter) This page is a two page layout but I don't have any GKD product on the second page so I'm not posting it. (I guess I don't have to explain but I usually journal on my pages and that is missing on this page.)

The heart stamp is from the set called How Sweet It Is! I have sprayed the white flower (Karen Foster) with Pink Taffy Glimmer Mist from Tattered Angels (I was inspired by StampTV get creative and embellish my flowers!) For the flower center I used my very first Nestabilities!! (Label One) Whoo-hoo I'm stepping up in the crafting world!

I glimmer misted the pink border and if you enlarge the photo I think you'll be able to see it. That was the easy step!! I embossed the stamped heart with clear embossing on the green patterned paper and then I cut out the heart that was a bit more tedious and after cutting it out and adhering it I poured Glossy Accents from Ranger into the cut out section to give it more of a dimensional look. I apologize the pic doesn't really do it justice.


This pink scalloped paper is from Bazzill and it is heart shaped and originally white. I first embossed with clear embossing powder from Ranger, then using my blending tool I added Distress Ink (worn lipstick) for color over the entire heart scalloped cardstock.

Here's a list of ingredients not mentioned: Paper: Bazzill cardstock; Die Cuts With a View, Nana's Nursery pattern paper; White buttons are from Gina K Designs; Pink buttons and felt flowers from Making Memories; Sentiment is computer generated and I used the Waterfall font. Pink Ribbon is American Crafts.

Project #2 Baby Card Plaid (5.5 x 4.25)

Here is a list of my ingredients:
Cardstock : Gina K Designs, Pure Luxury (cream, chocolate, kraft)
Designer paper: unknown (such a cute plaid with no markings on it and I got it on vacation!)
Stamps: Gina K Designs "How Sweet It Is"
Inks: Archival Ink (coffee : image and sentiment) Distress ink (broken china blended around scallop oval and sentiment box)
Prismacolor pencils: true blue, orange, deco yellow
Ribbon: American crafts
Button: Gina K Designs

Tools: Marvy Uchida Scallop Oval punch
Technique: I paper pieced the blanket sling the stork is holding


Project #3 Baby Card Star Embossed (5.5 x 4.25)


I used basically the same layout but there are some differences. I used a circle scallop punch from Marvy Uchida and an EK Success corner rounder. The other main difference is that I used my Cuttlebug and star folder and distress inked the paper (cardstock: Gina K Designs Pure Luxury, cream-colored) with Broken China Distress Ink from Ranger. Antique Linen Distress Ink was used to blend around the circle and sentiment.

Other ingredients I used:

Design Paper: DieCuts With A View, Nana's Nursery (boy) Ribbon: American Crafts; Buttons: Gina K Design; Hemp cord: Craft jewelry; Prismacolor pencils: deco yellow, orange, sienna brown.

You are a delight for visiting!! Thanks so much!


Photobucket

Tuesday, January 12, 2010

Grammie's Girl

Here is my second sketch from Scrapper's Edge: (#010810). Isn't this a fun one! Sondra said she is having fun creating these sketches and she already has another one posted on the the blog, so guess what I'm going to be doing.... (I'm so behind in my grandbabies scrapbooks this is just the push I needed!!)
I chose some fun products that I WON from participating in Melanie Muenchinger's 2nd Anniversary Blog Hop (she designs for Gina K Designs). Allison Cope from http://www.sosketchy.blogspot.com/ sent me two kits from WeScrap.com I was so blessed by her generosity!! Thank you again, Allison! I loved the Fancy Pants Designs paper that was included in one of the kits, so I got busy right away and everything from this one kit (minus black cardstock) is used in this layout.

(010810)

Here is the recipe of incredients for my card (thank you for coming by today, I'm delighted with every comment that is left!)

Paper: Fancy Pants: Dancing girls line:Dancing Girl, So Cute, Hip Hop
Cardstock: Bazzill
Alphas: Doodlebug Designs: Shin Dig, Beetle black glitter (cute!)
Ribbon: Maya Road, light purple velvet ric rac
Pearl: Kaisercraft
Flower: Imaginisce (white)
Tools: Marvy Uchida, (half a circle) scallop circle punch and small blossom punch, Ek Success: scallop photo corners punch
Bracket: Hot off the Press template
Nestabilities from Spellbinders, Labels One (Cuttlebug)
Have a super day and be a blessing to someone today!!

Photobucket

Color Monday, Sketch Tuesday and an Earthquake!

Well, it's been a few days since I've been able to really get creative due to other pressing matters, like work, my son's birthday, church, an EARTHQUAKE. That's right, it's my neck of the woods that encountered the 6.5 shaker that was on the news this past Saturday. I'm thankful that there were no serious injuries, there was quite a bit of structural damage in Eureka. I saw lots of broken windows as I was leaving town. Yup, that's right I had the good(?) fortune to be in Costco. Would not like to repeat that! It was a little freaky and very loud, HOWEVER, I know who I belong to and I tell you I experienced peace in the midst of the shaking so I want to say, thank you, Jesus!! If you'd like to see some pictures of our local scrapbook store and the mess we encountered you can go to http://www.scrappersedge.net/ we certainly feel blessed that there was no damage to the store and so what, if we gotta pick up merchandise and paper scattered all over!! No one was hurt only inconvenienced!
On to better and fun updates! Here is this weeks color and sketch challenge from Christian Paper Crafts. I'm not sure why the sketch turned out so tiny (I'll have to talk to Gloria about that!) but I did combine the two challenges! Color Challenge: light blue, any shade of brown & white. Use these colors in anyway that you are inspired! When uploading to our gallery at CPC please use keyword CM39 and when uploading to your blog or other online galleries, please use keyword CPC-CM39 and the sketch is CPC-ST39.

CPC-CM39 AND CPC-ST39

Here is the finished inside of the card.

I'm making cards for my mom for Christmas (I already gave her some and I altered a tin to keep them in!) and she wanted some sympathy cards so I'm in the process of making those for her.

Here are the ingredients to this very simple card, this was definitely a fast and easy one!

Paper: Kaiser Scrapbook (doublesided); Bazzill cardstock

Stamps: My Sentiments Exactly (MSE)

Ink: Ranger Archival Ink, coffee

Embellishments: Creative Charms, pearls; Bazzill ribbon

Tools: Cricut, Celebrations cartridge ( I used the number five which was "blacked-out" so that I could create a larger scallop to match the sketch. The sentiment block I didn't "scallop" but since there are no challenge police out there I did my own thing!! I also used an EK Success corner rounder.

Thanks for looking and I hope you'll play along and post in the gallery at Christian Paper Crafts we'd love to see your projects!

See you hopefully tomorrow I plan to post another sketch and this time I should have a scrapbook page to go along with it!! God bless and thanks for looking!!

Photobucket

Monday, January 11, 2010

Winner of $25 from Gina K Design announced!!

I just want to thank everyone for their sweet comments and your support of the Christian Paper Crafts blog hop featuring our sponsor Gina K Designs! I'm excited to share with you our winner. Without any further delays and with a drum roll (please I need your help on that one!) Our winner of the $25 gift certificate to be spent at the Gina K Designs store is...... with the help of random.org ......

JONIA who said,

"Natalie, I guess I found the "Stamp TV" logo above. So it is on your blog. I love the page for your grand daughter and she is just darling. There is nothing like being a grandmother. Thanks for sharing with us!"

Be sure to check back often and watch for more design work featuring Gina K Designs. Also, on Mondays and Thursdays during the rest of the month you will find at Christian Paper Crafts new creations featuring the GKD products. Hope to see you over there!

Photobucket

Friday, January 8, 2010

CPC Blog Hop featuring Gina K Designs!!

Welcome to the Christian Paper Crafts Blog Hop featuring our fabulous sponsor Gina K Designs!!

There's an awesome prize too that you can qualify for but you must comment on every design team member's blog. There will be one design team member who will have the Stamp TV logo on their blog, you'll need to look to see if you can find it. You can find a picture of it at CPC (Here)

You will have to identify which design team member has this logo in your comment on their blog. The prize winner will then be drawn from that blog and announced on Monday, January 11, 2009, at Christian Paper Crafts! What's the prize? It's a $25 gift certificate to Gina K. Designs! Whoo-hoo!! Is this not a great way to start the New Year!!

IMPORTANT UPDATE:
Gina's January release was on the 7th, so you can win this prize just in time to get one of her new stamp sets! Gina also has many more new releases of her exclusive Pure Luxury paper line, buttons, ribbons, punches, and a new Stamp TV kit! Don't forget to check out her Perfect Patterns Printable Templates too.

Here is my first project, but let me tell you how much I loved working with the Pure Luxury cardstock, WOW! It is perfectly named!! In this card I used the white and Kraft Pure Luxury and it was a dream to blend ink using the Tim Holtz blending tool from Ranger.


The stamp set I used is called "How Sweet It Is" is one of the stamp sets of "Stamps For A Cause" and this one benefits The American Diabetes Association and the Juvenile Diabetes Foundation. $7.00 of every set sold is divided evenly between these two organzations.

Here is my recipe for the card:Ink: Stazon, jet black (image & sentiment) Ranger Distress Ink: worn lipstick (for blending) Tattered Angels: Glimmer Mist, marshmallow (for a little sheen!)
I painted the image after stamping and I used the Claudine Hellmuth Studio Semi-gloss acrylic, sable brown, dash of red, the ice cream is painted with Adirondack Dabbers in the Metallic pearl and the spoon with the metallic silver (I didn't dab obviously but used a brush!) I also used a Prismacolor pencil, sienna brown for the stem.

inside of the card

Tools I used were the Cuttlebug, Swirls folder and the Marvy Uchida Scallop Circle and blended with the distress ink (worn lipstick) I added a cute piece of dotted ribbon to embellish the front. Matted the sentiment with the Kraft Luxury Cardstock and attached!


Here is my second project using this adorable set of stamps and I had an even adorable subject to work with, my oldest granddaughter, Riley Ann! This is her 2nd birthday, which was less than a month ago and I thought these stamps were perfect to embellish the layout!!

I also used one of the StampTV videos "Embellished Flowers" for inspiration, I painted an originally white flower, red with Claudine Hellmuth Studio acrylic paint, (color: dash of red).

I used a piece of the 8.5 x 11 Black Pure Luxury Cardstock as a background on the 12x12 cardstock (Bazzill) to anchor the layout. I printed a free calendar page (http://www.printable2009calendar.net/) and then arranged the pics, matted two in the black Luxury cardstock. I used the EK Success corner rounder to soften the edges of two of the pics.


Isn't the sentiment perfect for that expression!!

Here are more ingredients that I used: Stazon Ink, black; Distress Ink, worn lipstick; Dots on the flower (SU! retired stamp) Red and black sharpie; Buttons: BoBunny; Prismacolor pencils: rose deco, sienna brown, crimson red, deco yellow, rouge neon); OMS; See the wonderful tutorial on StampTV for Coloring with Colored Pencils. I did a little bit of embellishing with Icicle Stickles (on the cake) and I used the Marshmallow Glimmer Mist by Tattered Angels to sparkle up the centerpiece of the flower which was cut out using the Marvy Uchida scallop circle punch. The red grosgain ribbon is from JoAnn's (Offray brand)

Thank you so much for looking and have fun hopping and we'll see throughout January (every Monday and Thursday) with featured projects showcasing for you at the Design Team Delights Gina K. Designs Gallery at CPC and here!

Here's the order that you will want to hop:

Cindy
Angella
Marcelle
Natalie (this is me and where you are at now!)
Mary
Jen
Randi (Guest Designer)


Don't forget about the prize..... And THANK YOU Gina!

Photobucket